The first steps really are the hardest.
I’ve completed three blocks so far—most of them twice—just trying to get a feel for scale, assembly, and how all these tiny pieces are meant to fit together. And let me be honest: I have struggled.
The patterns for Dear Jane aren’t printed in the book; only the finished block graphics are. That means seam allowances, cutting dimensions, and stitching order are all left to interpretation. I’ve been relying heavily on my existing skills to reverse‑engineer each block: sketching layouts, mapping seams, deciding pressing direction, and eventually figuring out how the quilting lines should run.
Graph paper has been my best friend—drawing layout, cutting notes, and quilting direction gave me at least a starting point. Maybe I won’t need this level of detail for every block, but for this first set, it provided the confidence boost I needed.
I also committed to busting my scrap stash for this quilt and drastically underestimated just how much prep that involves: pre‑washing, ironing, and cutting small pieces with precision. Starch has become essential. These blocks are tiny, and even the slightest variation can throw the entire block off, which in turn affects the cumulative size of the quilt.
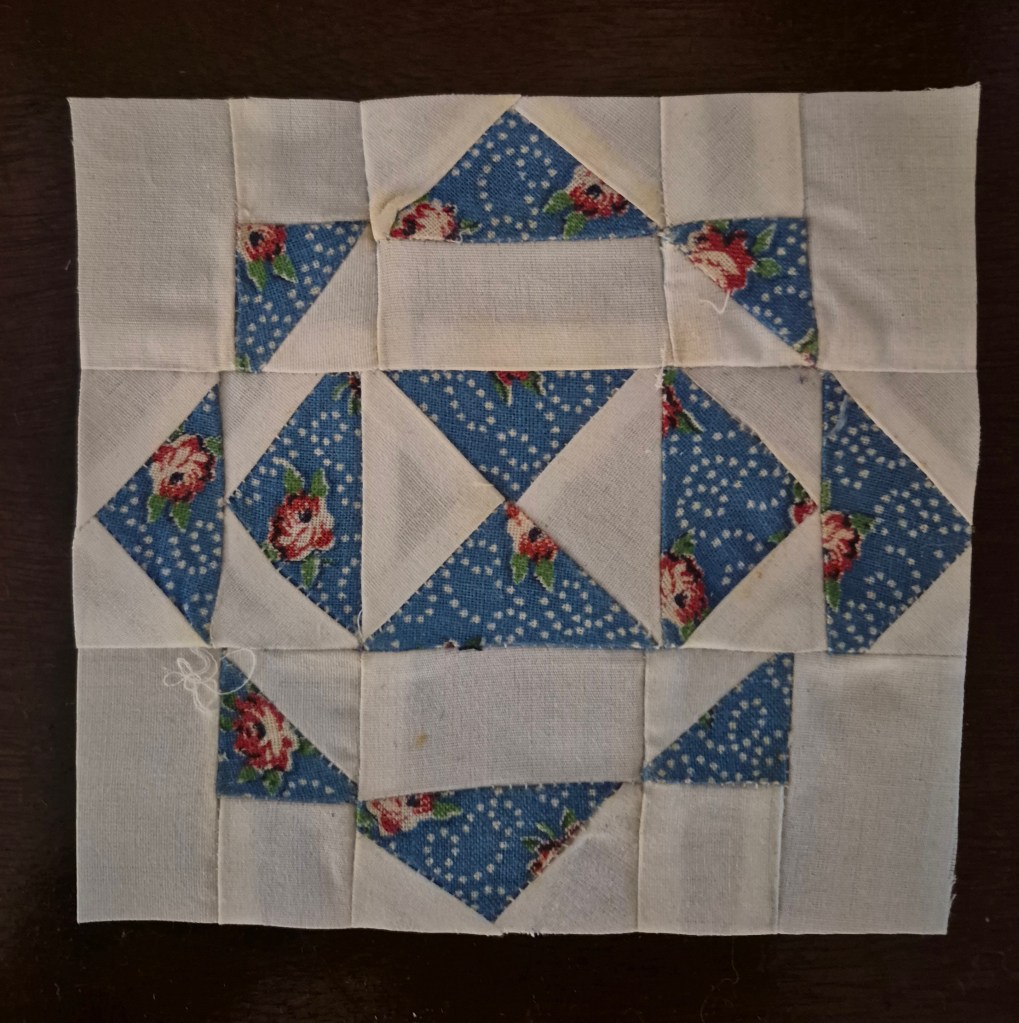
Block A1: Pinwheel Gone Awry

Having a plan and a rough layout sketch helped me get started. Is it pretty? No. Is it complete enough for anyone else to follow? Definitely not. But is it enough to get me moving? Absolutely.
And honestly, that’s the whole point. Your work isn’t being graded. As long as your system works for you, it’s good enough.
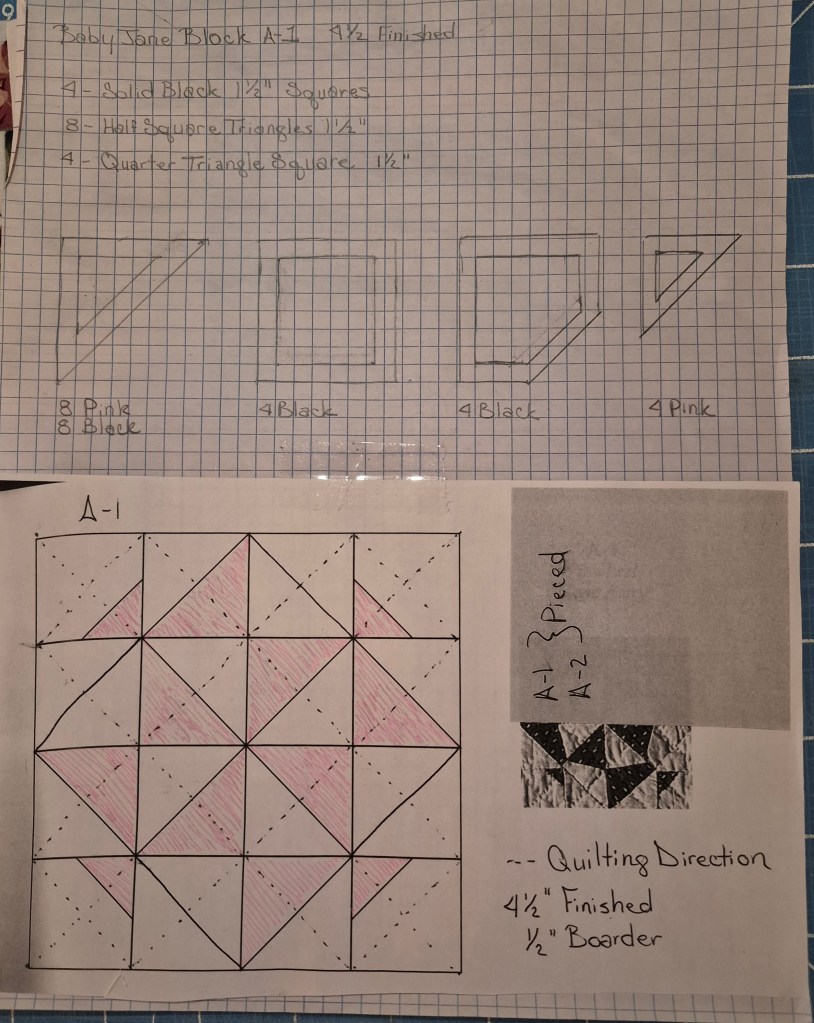
This block is mostly half‑square triangles—and this is where grainline absolutely matters. Cutting them on the bias introduces stretch that can warp the block. Keeping pieces on‑grain wherever possible helps maintain accuracy as you stitch.
Even the width of your pencil marks matters. A 1/32″ variance seems trivial, but across 5,602 pieces it adds up to roughly 43 inches of potential difference over the entire quilt. That means cut‑off points, lost seam allowances, and a quilt that doesn’t square the way you intended.
I promised to be honest with myself—and with you—throughout this process. That means showing the “not quite right” block that came before the correct one. It won’t make it into the finished quilt, but it isn’t wasted. My imperfect blocks will become the foundation for a crazy quilt where the “mistakes” can hide in embellishment and creativity.
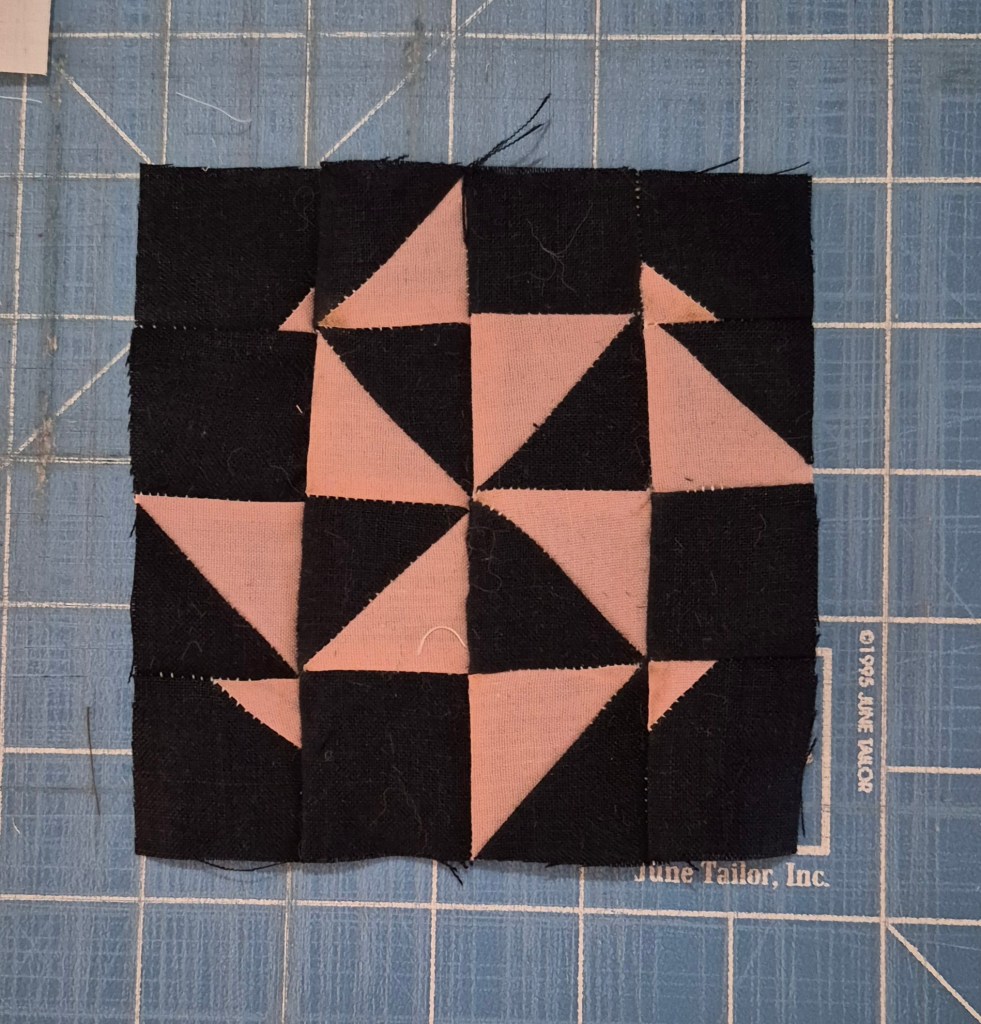
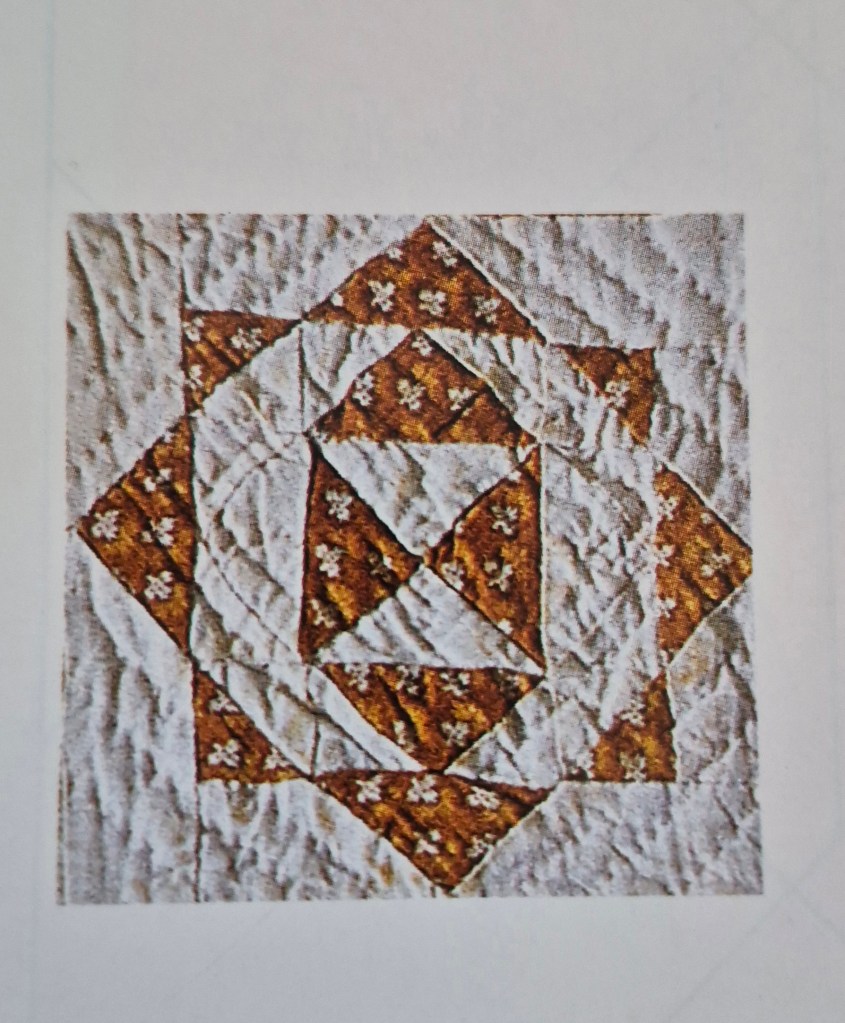
And finally, the first block! Not quite perfect, but definitely some of my best work and one I am proud to share with you.

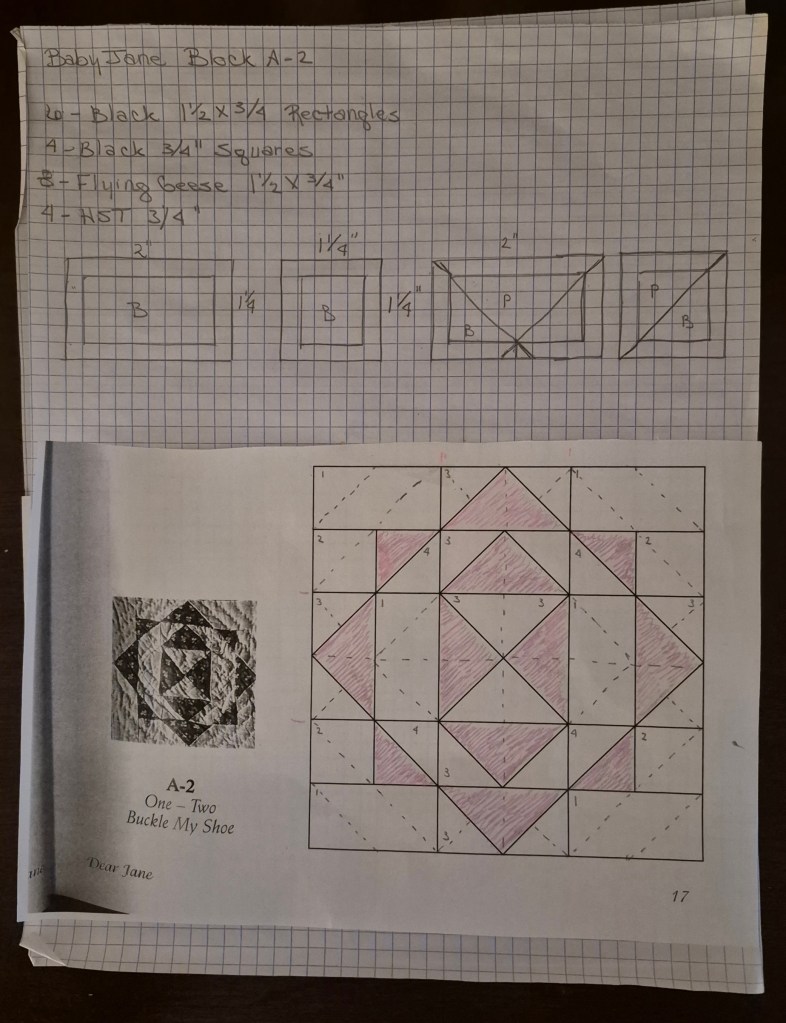
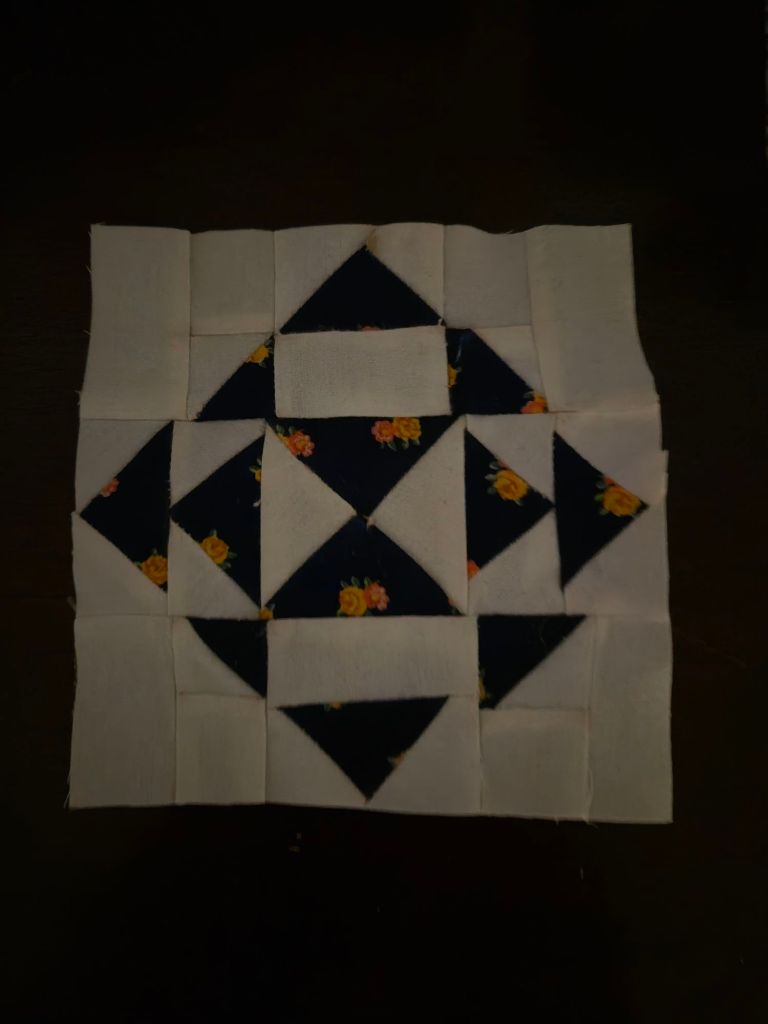
Block A2: One‑Two Buckle My Shoe
(insert original block picture)
I followed the same approach with this block: layout sketch, notes, reminders of what to do (and what not to do).
This layout was more straightforward. Or maybe surviving the first block gave me just enough confidence to move ahead boldly.

Then came the flying geese. Why I struggled so much with keeping the points is beyond me, but they simply refused to cooperate. So—deep breath. Grace. Patience. A redo. And a reminder of everything I learned from the first mistake.
I took a break—a “step away from the sewing machine” moment—to think about my choices. Am I really going to have to make every block twice? How badly do I want this quilt? And why, exactly, did I decide to document this publicly? (A question for therapy, perhaps.)
But revisiting my why whenever frustration hits is what keeps me grounded and moving forward.
And just like that, the second attempt came together with ease and a level of skill I frequently underestimate in myself.
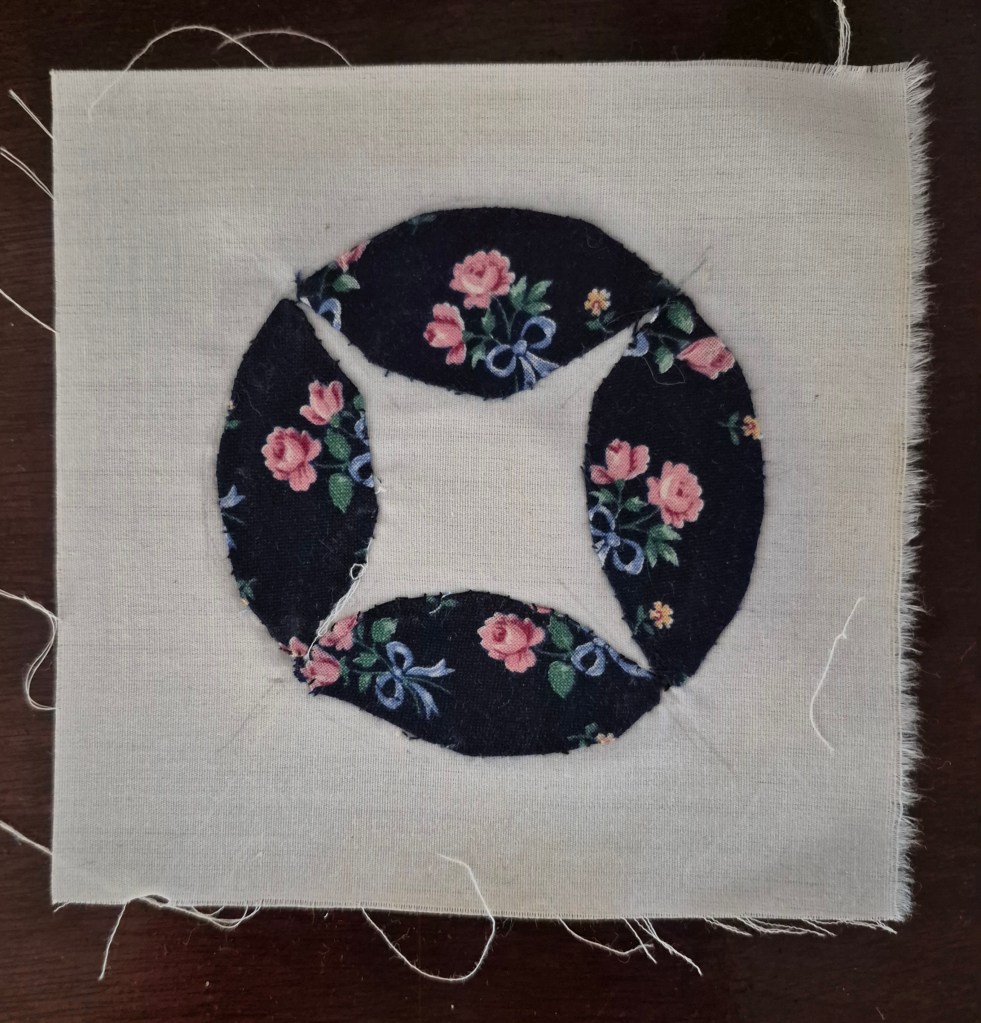
Block A3: Hunter’s Moon
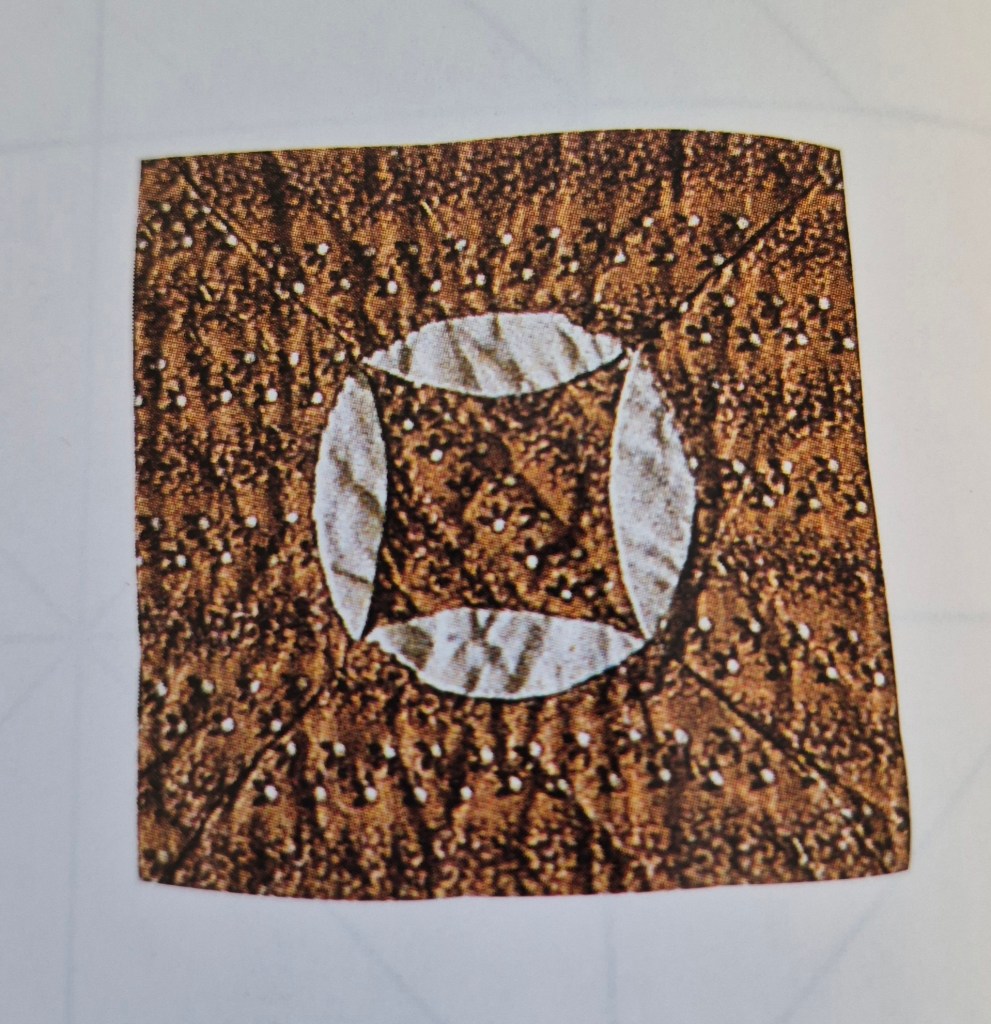
For this block, my mix‑and‑match approach of machine piecing and hand piecing continues. Straight seams? Machine all the way. But Block A3’s curves and appliqué call for handwork. Blind appliqué has always been one of my shakier skills, but the only way to improve is to practice—so that’s exactly what I’m doing.
I kept the same habit of layout sketches and notes to guide me.
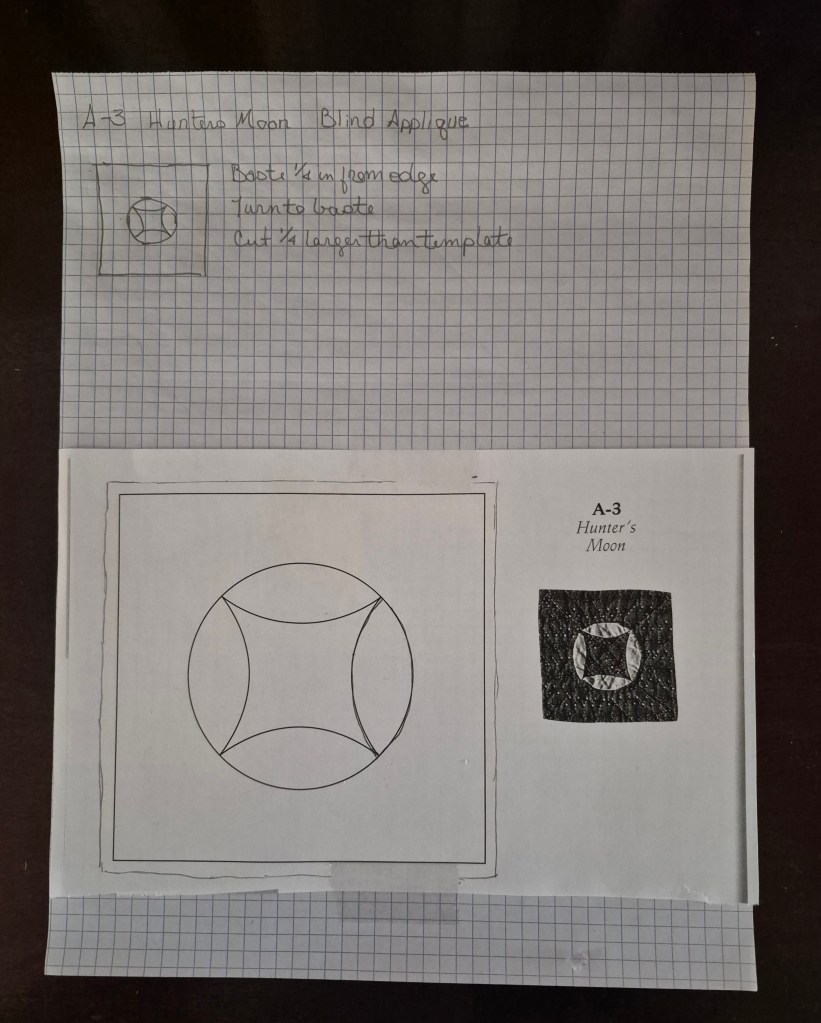
And here’s a delightful twist in the learning process:
The best explanation I’ve ever encountered for blind appliqué didn’t come from a tutorial or a class—it came from a fiction book. The Aloha Quilt by Jennifer Chiaverini includes a beautifully written description of Hawaiian appliqué techniques, from basting to needle‑turning. That passage alone added “learn Hawaiian‑style quilting” to my someday list.
And just like that, the first attempt at Block A3 is one I can truly be satisfied with.
And so, the journey begins.
Slow, challenging, humbling—and absolutely worth it.
